Advertisement
You’ve tried every lamp and still your living room reads dim by 3 p.m. The common mistake? Hanging a small mirror anywhere there’s wall space and hoping it helps. You want daylight to bounce deeper into the room and evening light to feel bright, not glare-y. This guide will help you decide exactly where to place mirrors, which sizes and finishes to buy, what to avoid, and renter-friendly ways to copy the look without wasting money.
Quick Answer: To maximize light, place a large, low-distortion mirror directly across from or at a 45-degree angle to a window, keep it at eye height (centered between 57–60 inches from the floor), choose thin or polished frames to reduce visual weight, and use a matte wall behind the mirror to avoid hot spots. In windowless corners, flank a lamp with two mirrors, or float a mirror opposite a bright doorway to “borrow” light from adjacent rooms. Always test glare from screens and avoid mirrors facing clutter or dark fabric sofas.
| Idea | Best For | Budget Level | Mistake To Avoid |
|---|---|---|---|
| Opposite-Window Mirror Wall | Dim living rooms | $$–$$$ | Too small or too high for the sightline |
| Angled Corner Mirror | Rooms with glare-prone TV walls | $–$$ | Reflecting cluttered bookcases or cables |
| Doorway “Light Borrowing” | Studio layouts, narrow halls | $–$$ | Blocking paths with deep console tables |
| Flanking Sconces + Mirror | Dark entries and bathrooms | $$ | Cool bulbs with warm paint (color clash) |
| Floor Mirror Behind Seating | Short ceilings, small dens | $–$$$ | Unanchored mirrors tipping or warping rugs |
| Gallery of Small Mirrors | Renters, awkward nooks | $ | Mismatched heights and distorted reflections |
| Kitchen Backsplash Mirror | Windowless kitchens | $$–$$$ | Using regular glass (difficult cleaning) |
© 2025 AI Illustrator — Inspiration Only
What’s Your Apartment Decor Style?
Answer these quick questions to discover your perfect decor vibe.
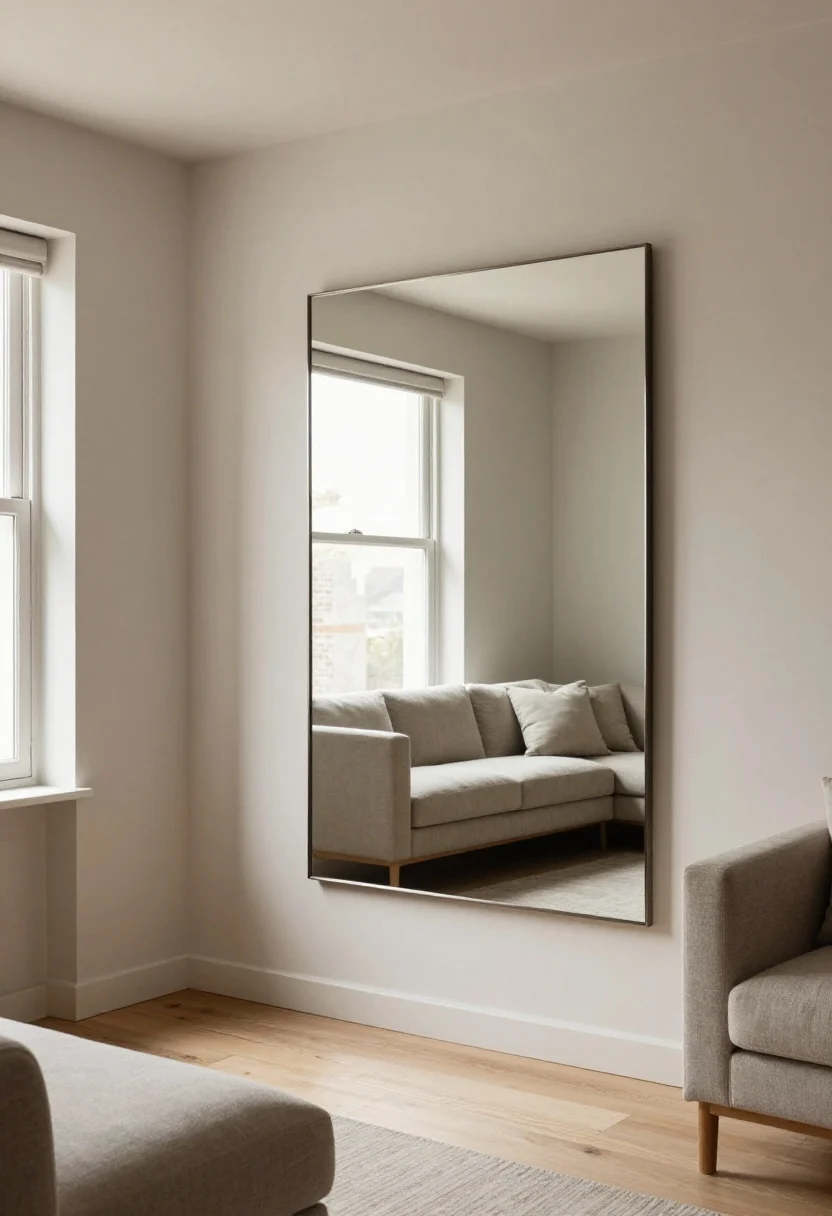
1. Opposite the Window: The Big, Clear Bounce
© 2025 AI Illustrator — Inspiration Only
Problem: Your living room window faces a brick wall and the space feels flat, especially across from the window where the sofa sits in shadow.
Why it works: Placing a large mirror directly opposite a window doubles the “view” of the outdoors and quadruples light paths by sending rays back into the room. Scale and position ensure that the mirror catches the brightest part of the sky, not just the neighbor’s fire escape. A thin or low-profile frame keeps attention on the reflected light, not the object.
- Choose size: For a standard 8–9 ft ceiling, aim for a mirror at least 30–40 inches wide; bigger if your wall allows. If you can’t go big, consider two identical mirrors spaced evenly.
- Mount height: Center the mirror 57–60 inches from the floor (eye level) to capture sky glare rather than ground shadows. If it’s tall, let the bottom sit 6–10 inches above a console or sofa back.
- Finish matters: Opt for a polished-edge or thin metal frame. Thick, dark frames absorb light visually and add weight.
- Backdrop: Paint the opposite wall matte or eggshell to avoid hot spots. Semi-gloss bounces but can glare.
- Test the angle: Before drilling, prop the mirror and check reflections at 9 a.m., noon, and 4 p.m. to ensure it catches light when you use the room.
Mistake to avoid: Mirrors that are too small or hung too high miss sunlight bands and reflect mostly ceiling. Avoid beveled tiles that create tiny, choppy reflections—great for sparkle, not for brightening.
Once you’ve set a strong opposite-window anchor, you can layer more targeted reflections where light drops off.
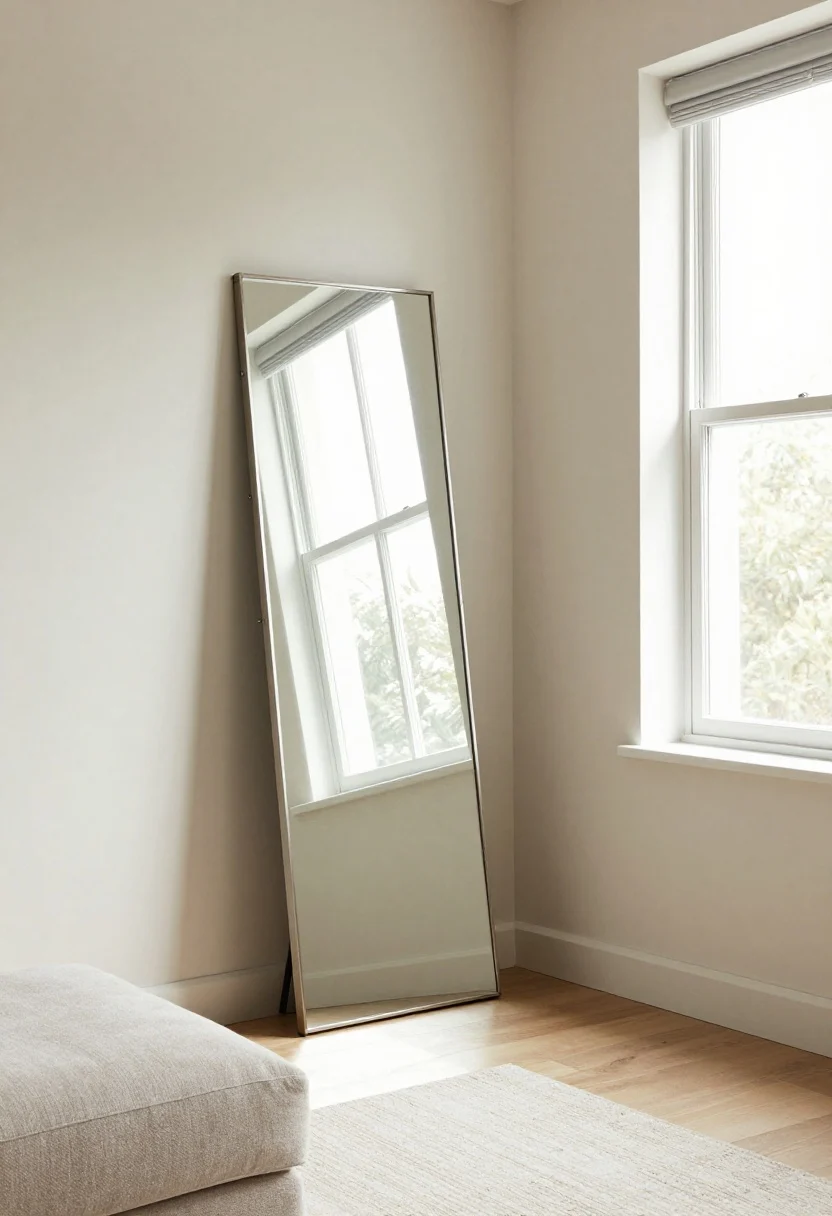
2. The 45-Degree Corner Mirror That Stops Glare
© 2025 AI Illustrator — Inspiration Only
Problem: Your TV wall gets brutal glare from an opposite window, but blocking the window kills daylight.
Why it works: Placing a mirror at a 45-degree angle in a room corner redirects the light path away from screens and back into circulation zones. This uses layout and focal point logic: corners are underused vertical real estate. You keep the window open while reducing direct reflection on your TV or glossy artwork.
- Pick the corner: Choose the corner adjacent to the window wall, not directly across from the TV.
- Go tall: A floor mirror 65–72 inches tall with a minimal frame will grab both high and low light. Secure it with anti-tip straps if leaning.
- Angle precisely: Start around 45 degrees to the window wall. Adjust in 5-degree nudges until screen glare disappears when seated.
- Soften surroundings: Add a low-pile 5×8 rug and fabric ottoman to absorb the extra brightness and keep acoustics comfortable.
Budget note: A big-box 28×70-inch mirror often runs $80–$200; spend on safe mounting hardware. Skip ornate frames; they read busy in corners and reduce reflective surface area.
With glare under control, you’re ready to use mirrors in pass-through zones to push light farther.
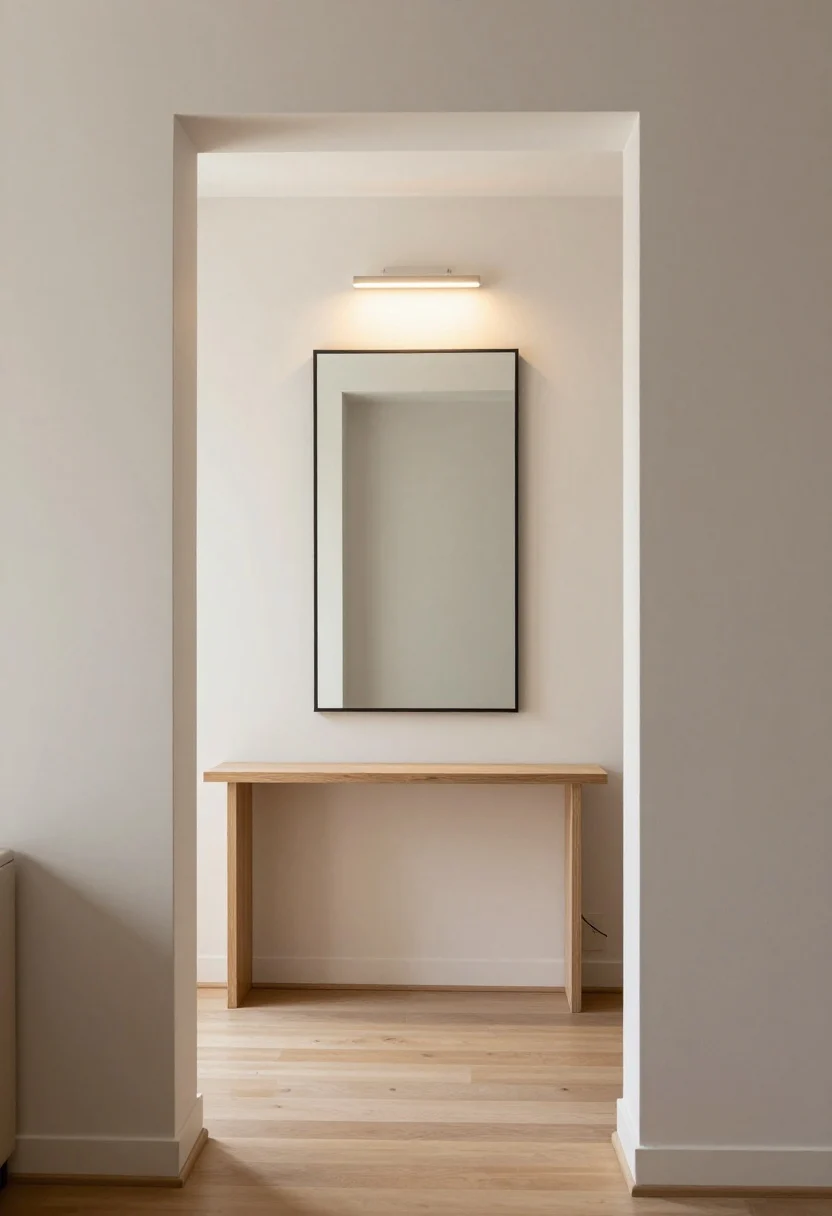
3. Borrow Light From Doorways and Halls
© 2025 AI Illustrator — Inspiration Only
Problem: Your studio’s main room is bright near the balcony but the bed nook and entry stay gloomy.
Why it works: Doorways act like light tunnels. A mirror placed opposite or just inside a bright threshold captures spillover and distributes it into darker parts of the layout. You’re leveraging traffic flow: every time a door opens, brightness increases, and the mirror multiplies it.
- Where to place: Hang a mirror directly across from the brightest doorway (to balcony or kitchen) to “pull” light into the adjacent zone.
- Match scale to path: In a narrow hall (36 inches wide), keep mirror depth low—use frameless or 1-inch-thick frames to avoid snags.
- Height rule: Keep centerline 57–60 inches high so most people catch and throw light without seeing only the floor.
- Layer lighting: Add a 2700–3000K LED sconce or plug-in lamp near the mirror. The lamp’s light will double at night.
Mistake to avoid: Pairing mirrors with deep console tables in tight halls. They shrink the walkway and block the mirror’s angle. Consider a wall shelf with 4–6 inches depth instead.
Once your thresholds work for you, consider mirrors where you most often need task brightness—entries and bathrooms.
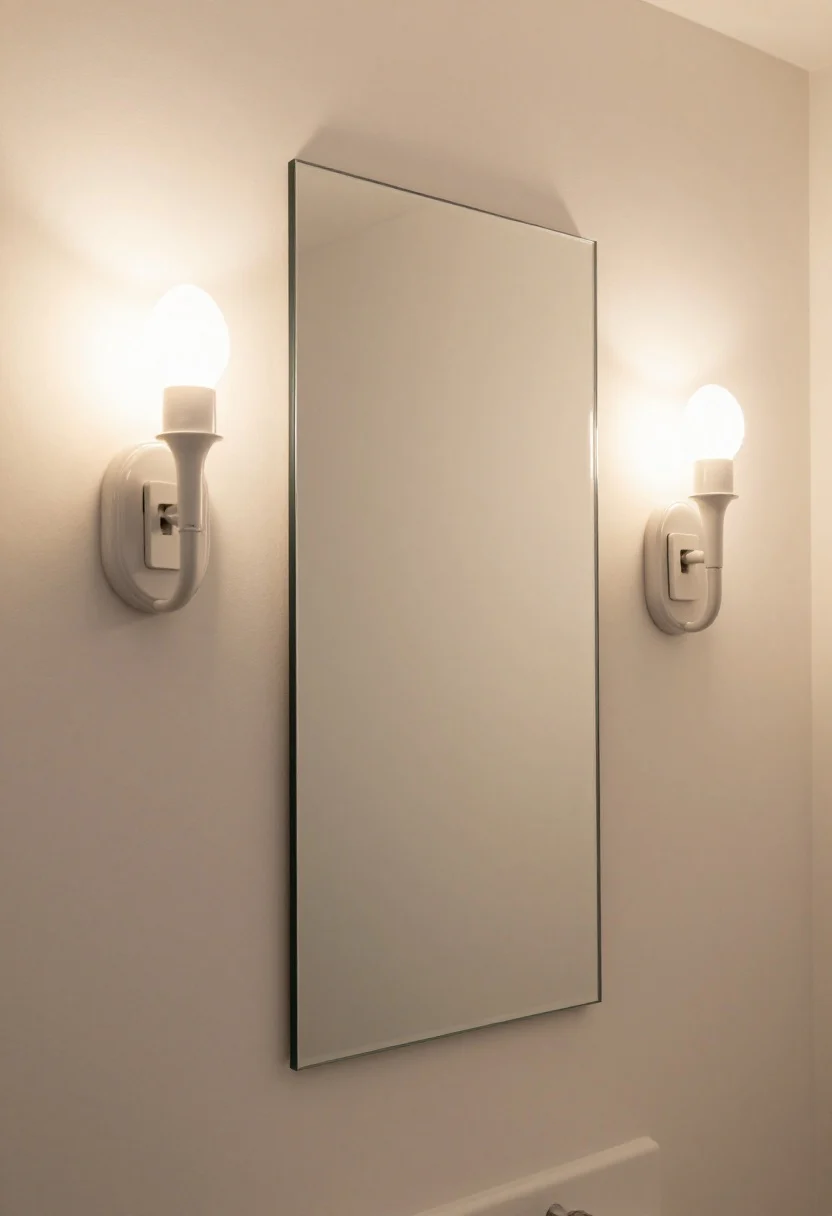
4. Entry and Bathroom: Sconce-Flanked Mirrors for Even Glow
© 2025 AI Illustrator — Inspiration Only
Problem: Your entry mirror looks pretty but casts shadows on your face; the bathroom’s overhead light creates raccoon eyes.
Why it works: Flanking a mirror with sconces at eye height creates balanced vertical light that’s ideal for grooming and last-look checks. Even lighting reduces harsh contrast, letting the mirror bounce a pleasant, soft field of light rather than a single hotspot. This is about lighting temperature and focal point: your face becomes the focal point, not the bulb.
- Mount sconces: Place sconces 60–66 inches from the floor and 28–36 inches apart around a 20–28-inch-wide mirror.
- Choose bulbs: 2700–3000K LEDs at 90+ CRI for accurate color reading; aim for 8–12 watts per sconce (equivalent 60–75W incandescent).
- Mirror spec: Flat, silvered glass (not antique) for true reflection. Anti-fog film in baths helps.
- Wall finish: Use eggshell paint; it diffuses sconce glow without making the wall shiny in photos.
Budget note: Plug-in sconces are renter-friendly and cost $50–$120 each; run the cord in a paintable channel. Skip cool 4000K bulbs unless your palette is cool gray; they can fight warm wood tones and make skin look sallow.
With your face-lit areas handled, turn to vertical tricks that make low ceilings feel less oppressive while still brightening the room.
5. Floor Mirrors Behind Seating to Stretch Height
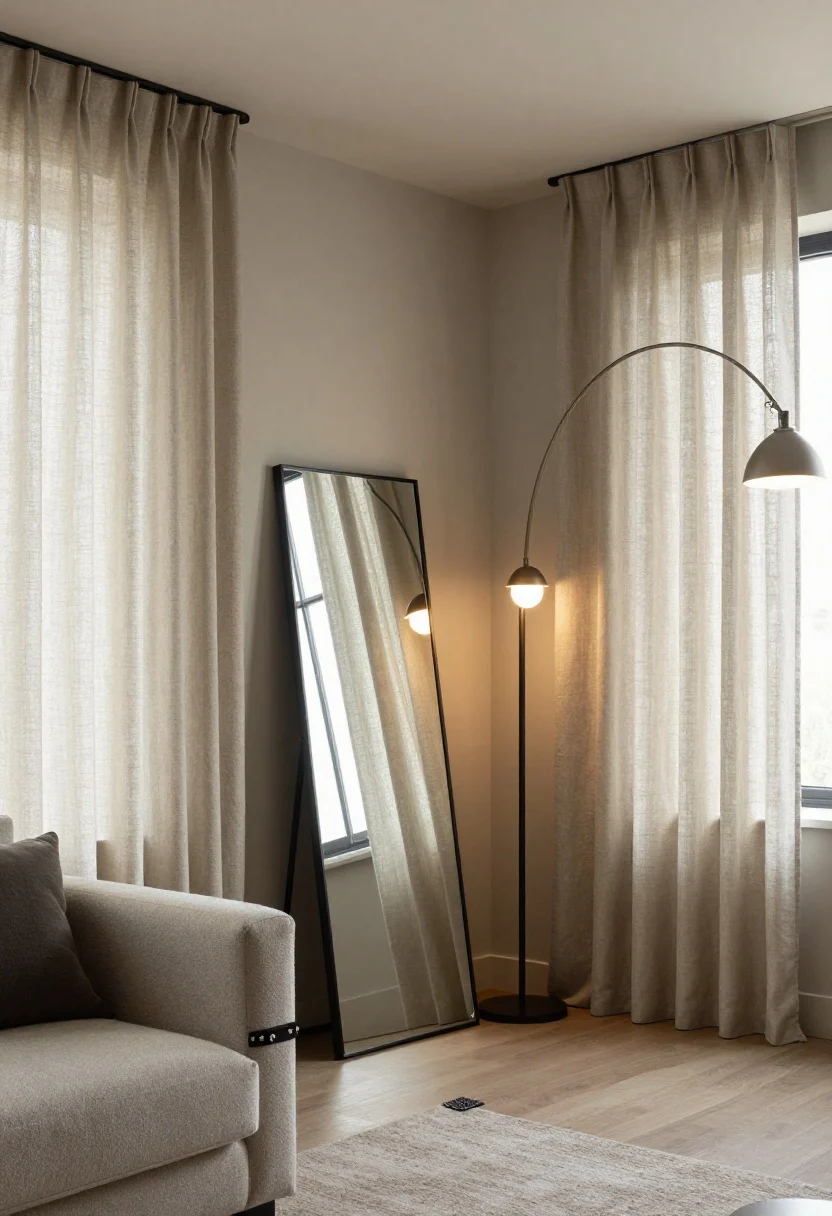
© 2025 AI Illustrator — Inspiration Only
Problem: Ceilings feel short, and your sofa sits on the only solid wall, leaving no obvious mirror spot.
Why it works: A tall mirror tucked just behind a sofa or accent chair creates a vertical axis. It visually “adds” height by reflecting drapery, ceiling planes, and tall lamps, distributing light upward while keeping the mirror out of direct traffic. This addresses furniture scale and focal point: the seated vignette becomes a quietly luminous feature.
- Pick placement: Slide a 70–80-inch mirror 3–6 inches behind the sofa arm or an accent chair angled toward a window.
- Anchor it: Use furniture straps or French cleats if the mirror stands free. Safety first—especially on slippery rugs.
- Coordinate textures: Pair with a linen or textured curtain hung high (2–4 inches below the ceiling) to give the mirror appealing vertical content to reflect.
- Lamp boost: Place a 60–72-inch arc or column lamp near the mirror; its glow will double at night.
Mistake to avoid: Leaning a mirror against a soft rug without a grip pad—mirrors can drift and tip. Add a non-slip pad under the rug corner and secure the top with discreet brackets.
If you can’t swing a giant mirror, a composed group of smaller pieces can still manage the light—if you plan it.
6. Curated Gallery of Small Mirrors (Without the Funhouse Effect)
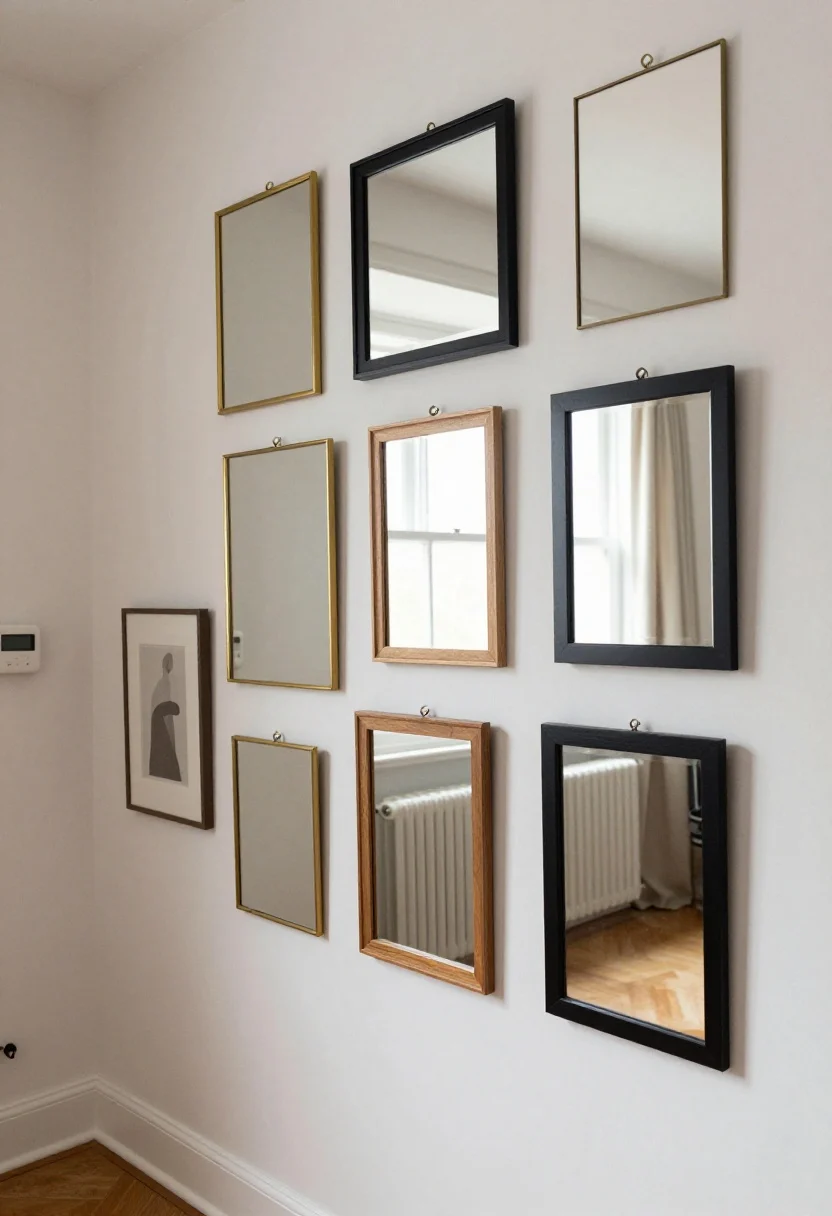
© 2025 AI Illustrator — Inspiration Only
Problem: Your wall is broken by a radiator and thermostat, and big mirrors won’t fit; you still want more daylight reach.
Why it works: A tightly edited cluster of small to medium mirrors forms one optical surface that catches and disperses light across multiple angles. The magic is consistency—matching color temperature and frame tone so the group reads as one element, not clutter. This leans on texture and color balance to build cohesion.
- Set rules: Choose 3–6 mirrors with consistent finishes (all brass, all black, or all wood) and flat, non-warped glass. Avoid heavy beveling or concave shapes.
- Plan layout: Tape paper cutouts on the wall, keeping 2 inches between pieces and aligning the midlines at 57–60 inches height.
- Renter-friendly: Use removable hooks rated for the mirror weight. Start with the largest piece, then build out.
- Reflections audit: Stand at key spots (sofa, entry, desk). If any mirror reflects clutter—cords, laundry baskets—swap positions or adjust angle.
Budget tip: Thrift stores and online marketplaces have plenty of small mirrors. Prioritize clear glass and solid backing over ornate frames; re-spray frames in a single color for unity. Skip mirrors with visible silvering damage—the haze will dim the effect.
Now for the most underrated light trick: using mirrors where grease and steam usually scare people off.
7. Kitchen and Dining: Reflect Backsplashes and Table Glow

© 2025 AI Illustrator — Inspiration Only
Problem: Your galley kitchen has no window, and the dining niche feels like a cave.
Why it works: Mirrors placed as a backsplash or behind a console in the dining zone multiply task lighting and candlelight, making compact spaces feel brighter without installing more fixtures. The strategy balances lighting and texture: mirror smoothness adds crispness, while surrounding matte materials prevent glare overload.
- Backsplash choice: Use mirrored acrylic or tempered mirrored glass tiles. Acrylic is lighter and renter-friendly (peel-and-stick); tempered glass is more durable and easier to clean long-term.
- Edge quality: Specify “low-iron” glass for less green cast, especially if your palette is warm oak or creamy white.
- Install steps: Clean wall, apply peel-and-stick panels level, caulk edges with clear silicone. For permanent installs, hire a pro for tempered glass cuts around outlets.
- Dining boost: Hang a 30–36-inch round mirror centered 6–8 inches above a console behind the dining table to double pendant or candlelight.
Mistake to avoid: Regular mirror panels behind a cooktop—they’re hard to keep pristine and can be unsafe. Keep mirror away from direct flame zones; use it behind the sink or coffee station instead.
With these placements sorted, a few buying and skipping guidelines will save you from costly returns.
What To Buy / What To Skip
- Buy: Large flat mirrors with solid MDF or metal backing; thin frames; low-iron glass; safety film or tempered options; anti-tip hardware; removable hooks for renters; 2700–3000K LED bulbs at 90+ CRI.
- Skip: Heavily beveled tiles for main bounce walls; convex or funhouse shapes unless styled; thick, dark frames that shrink reflective area; mirror near direct stove heat; super cool 4000–5000K bulbs in warm palettes.
Common Designer Mistakes That Kill Mirror Brightness
- Hanging mirrors too high so they reflect ceiling can lights instead of windows.
- Pointing mirrors at dark sofas, bookcases, or black TVs; you’ll reflect darkness, not light.
- Ignoring wall finish: high-gloss paint plus mirrors can create eye-level glare bands.
- Choosing antique or smoky mirrors for primary brightness—they mute and warm the reflection, better as accent texture.
- Forgetting safety: leaning mirrors on slippery floors, especially in rentals or around pets.
Budget-Friendly Alternatives That Still Look Good
- Peel-and-stick mirrored acrylic tiles: Good for small backsplashes or inside cabinet doors to bounce under-cabinet light. Clean with microfiber and mild soap to avoid scratching.
- Secondhand mirrors: Check for glass flatness by viewing a straight doorframe edge in reflection—wavy = distorted. Repaint frames to match hardware.
- Mirrored trays and panels: Place on consoles to double lamp glow and candles. Stable, low-commitment brightness.
- Door mirrors: Over-the-door full-length mirrors behind closet or entry doors to snag corridor light without drilling.
FAQs
1) How big should a mirror be to actually brighten a small room?
As a rule, choose the largest mirror your wall can support while keeping at least 6–8 inches of breathing room from adjacent corners or trim. For living rooms, 30–40 inches wide is a solid minimum; tall floor mirrors (65–80 inches) extend vertical light spread.
2) What frame color works best for bouncing light?
Polished edge, thin brass, matte black, or slim wood frames all work. The key is minimal thickness so you maximize reflective surface. Avoid chunky dark frames on your main bounce wall; they add visual weight and reduce brightness.
3) Can I use antique or tinted mirrors to increase brightness?
Use them as accents, not as your primary brightener. Antique or bronze-tinted mirrors warm and soften reflections but cut overall luminosity. Pair one aged panel with a larger clear mirror elsewhere to balance mood and light.
4) How do I stop a mirror from reflecting clutter or cords?
Do a reflection audit before mounting: stand at seating height and entry points. If you see cords or bins, either manage the clutter with baskets and cord channels, shift the mirror a few inches, or tilt it slightly to catch a better view line (drapery, window, artwork).
5) What’s the safest way to lean a big floor mirror in a rental?
Use anti-tip straps into studs where possible; if not, use heavy-duty removable anchors rated for the mirror’s weight, plus a non-slip rug pad under the base. Keep traffic paths clear by 24–30 inches to prevent accidental bumps.
Conclusion: If you try just one idea first, make it a large, thin-framed mirror directly opposite your brightest window—set at eye height with a matte wall behind it. It’s the fastest way to double daylight in a small apartment. From there, add a corner-angled floor mirror to kill glare, or borrow light from doorways with a slim hall mirror and warm LEDs. Choose clear glass, secure it well, and point it at something bright. The right placement does the heavy lifting—your lamps and windows simply do more work for free.
Before You Start: Quick Decorating Checklist
- Measure the room before buying furniture or storage pieces.
- Choose one main focal point so the space does not feel busy.
- Repeat at least one finish, texture, or color to make the room feel intentional.
- Check lighting temperature, traffic flow, and cleaning needs before copying the look.
Helpful Product Ideas To Compare
Affiliate disclosure: Some links may be affiliate links. Compare size, material, reviews, and return policy before buying.
- Shop Mirror Placement Tricks Double Decor — useful for checking price ranges, finishes, and real customer photos.
- Shop Mirror Placement Tricks Double Storage — useful for checking price ranges, finishes, and real customer photos.
- Shop Mirror Placement Tricks Double Lighting — useful for checking price ranges, finishes, and real customer photos.