Advertisement
Your small kitchen deserves big style, and yes—you can absolutely get it with peel-and-stick. No, it won’t look like a dorm DIY if you choose smart finishes and install them right. Think sleek textures, luxe tones, and patterns that trick the eye into thinking… custom renovation.
Let’s jump into eight ideas that actually look expensive, fit small spaces, and won’t make your landlord cry. Ready?
1. Luxe Marble Looks Without the Drama
© 2025 AI Illustrator — Inspiration Only
What’s Your Apartment Decor Style?
Answer these quick questions to discover your perfect decor vibe.
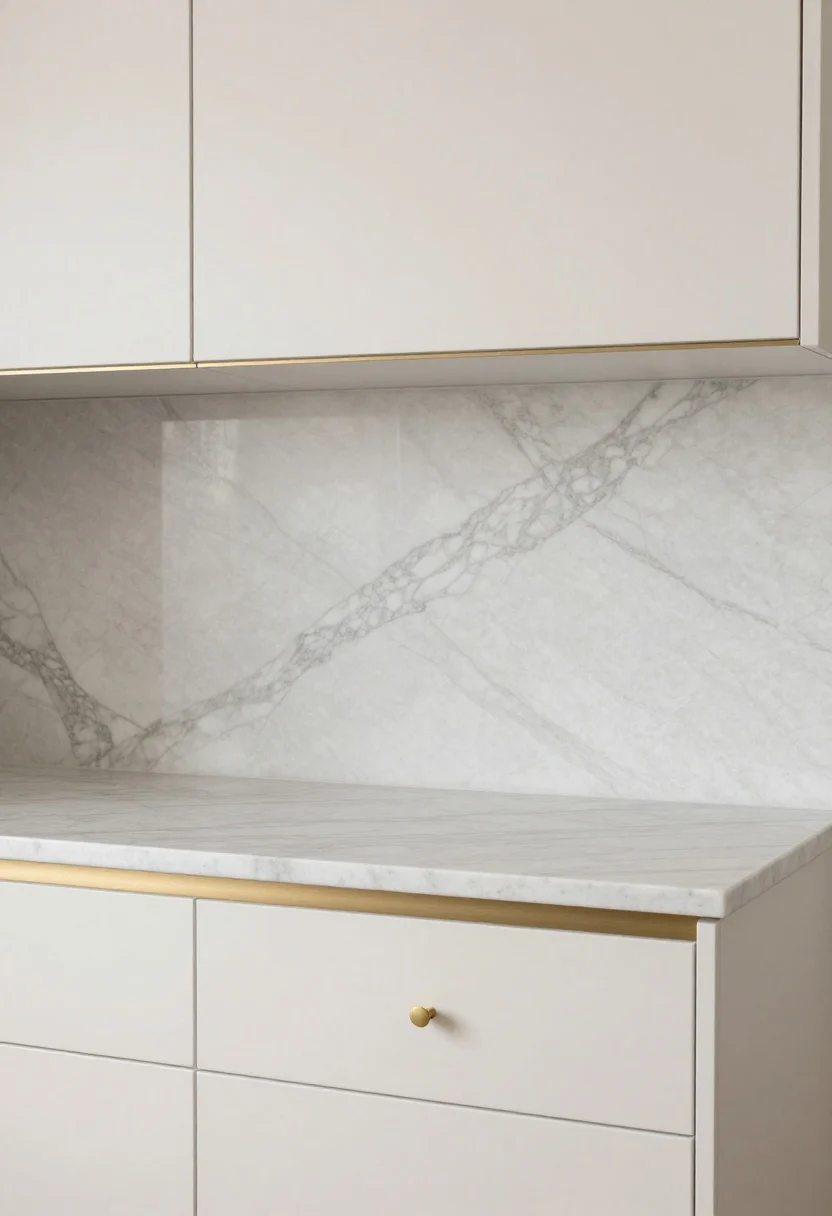
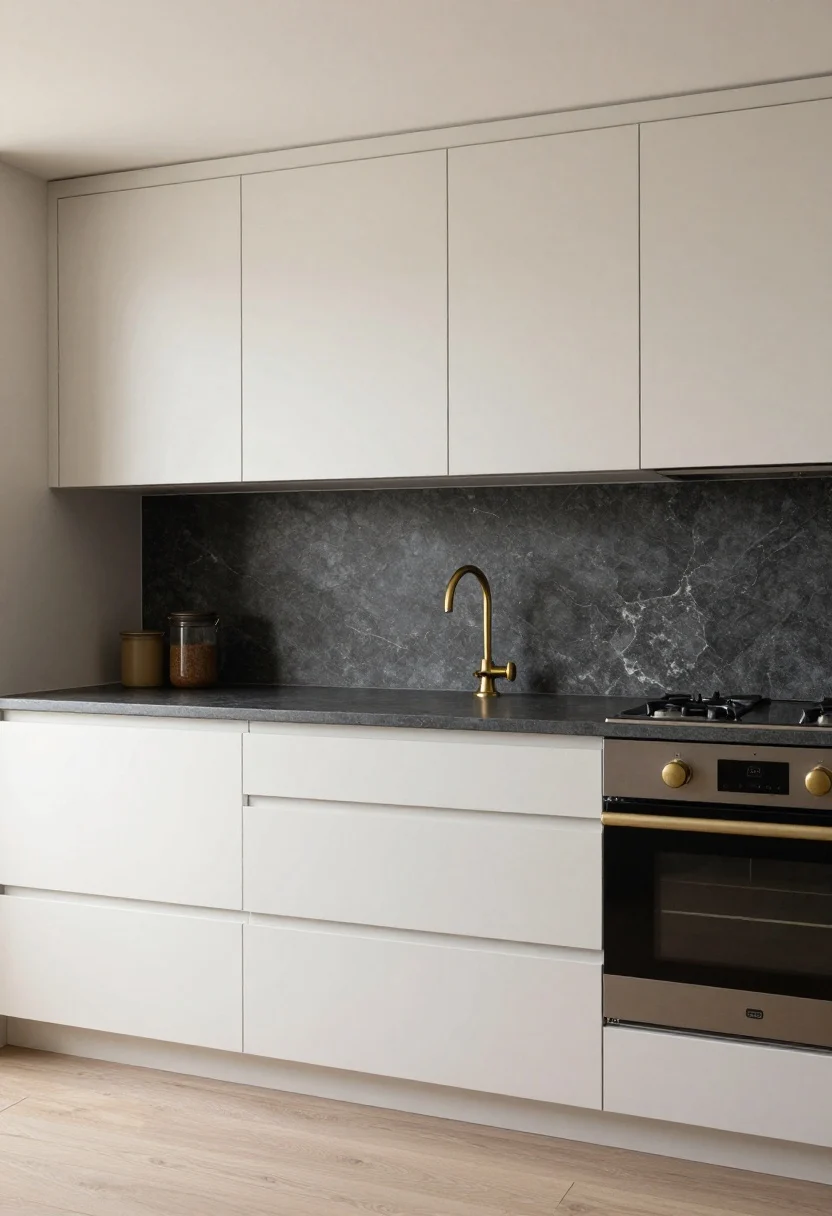
Marble is the fashion editor of backsplashes—classic, crisp, and a little high-maintenance. Except peel-and-stick versions skip the maintenance and keep the glam. Look for Calacatta or Carrara-inspired prints with soft veining and a low-sheen finish so they don’t scream “plastic.”
Why It Works in Small Kitchens
Light marble patterns bounce light around and make tight spaces feel airy. Plus, those delicate veins add movement without overwhelming your narrow galley or kitchenette.
- Pro Tip: Choose matte or satin finishes to avoid glare that highlights seams.
- Color Hack: Pair with warm white cabinets and brass hardware for a “custom millwork” vibe.
- Edge Strategy: Finish edges with a thin metal trim for a built-in look.
2. Modern Zellige (Without the Price Tag)
© 2025 AI Illustrator — Inspiration Only
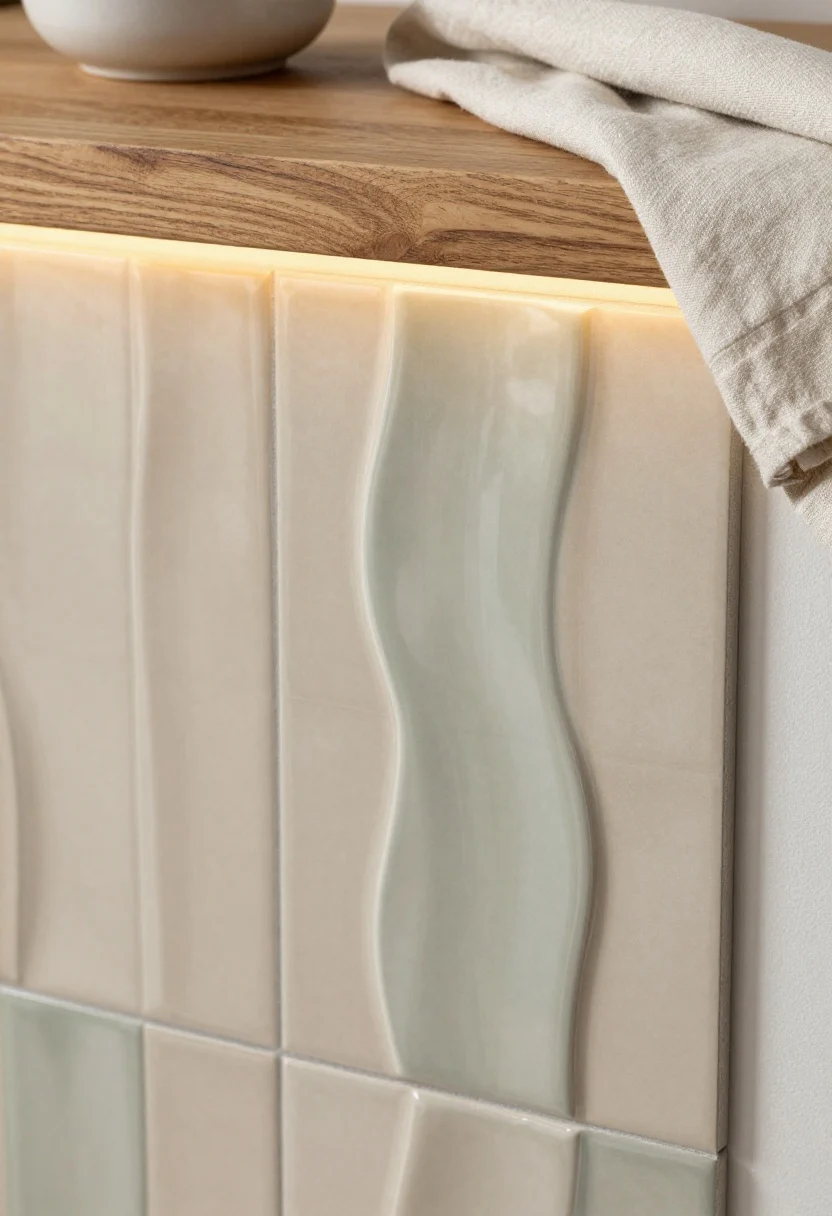
If you’re into that artisan, wabi-sabi look, go for zellige-style peel-and-stick tiles. The trick is choosing versions with subtle color variation and a glazed texture—that’s what makes it feel handmade, not mass-produced.
Styling Notes
Stick to soft neutrals like sand, mushroom, or sage. In a small kitchen, subtle tonal shifts add depth and keep things cozy without visual noise.
- Layout Tip: Run tiles straight stack instead of offset for a modern, gallery-like vibe.
- Warm It Up: Add a wood cutting board, linen tea towels, and a ceramic utensil crock to layer textures.
- Lighting: Zellige shines (literally) under warm under-cabinet LEDs—instant boutique-kitchen energy.
3. Skinny Sticks: Slim Subway for a Tall Illusion
© 2025 AI Illustrator — Inspiration Only
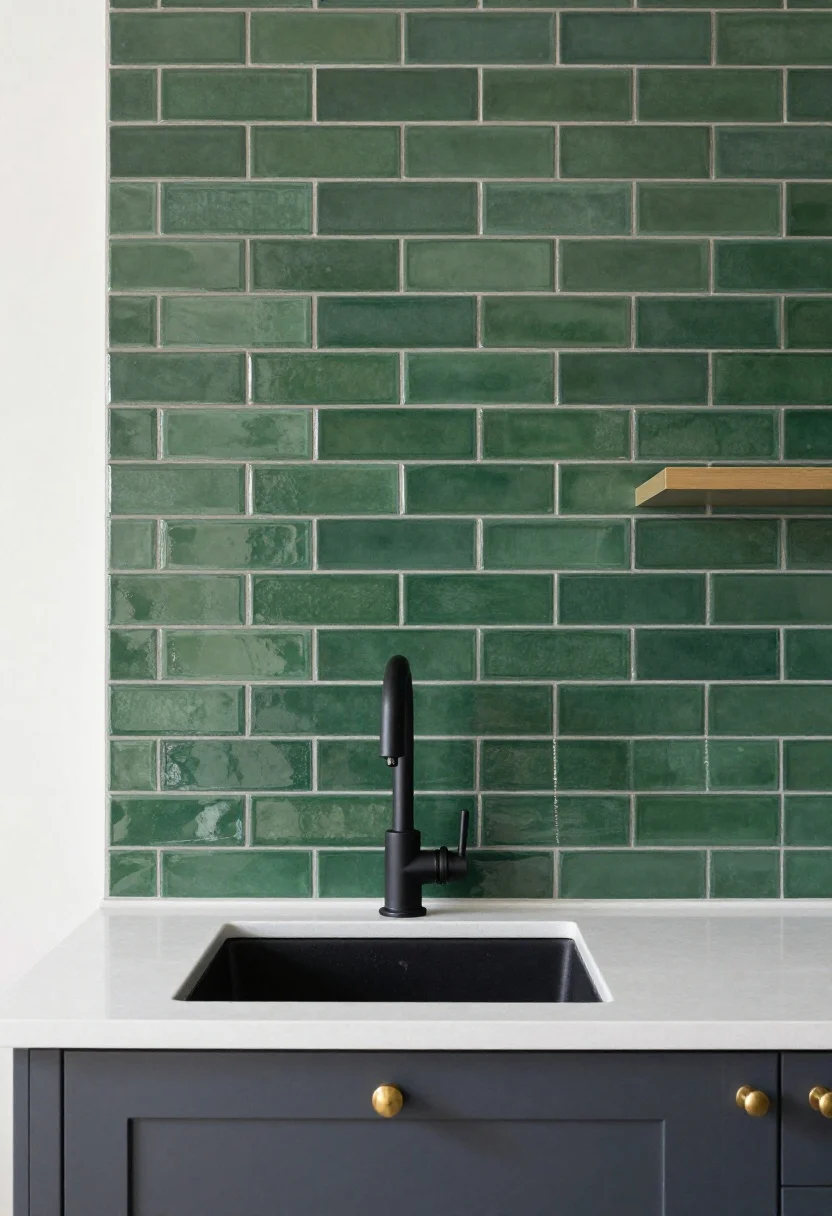
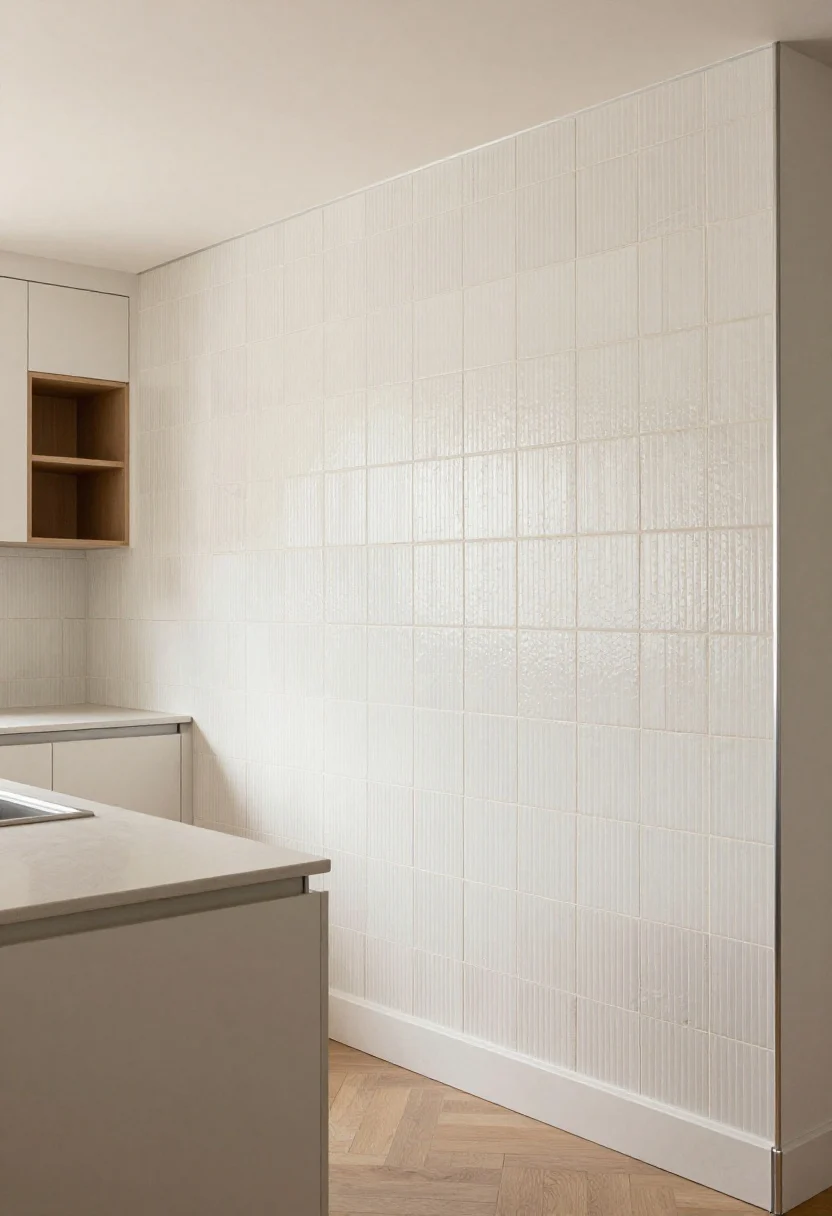
Classic subway is fine, but in small kitchens, slim elongated tiles feel custom and elongate your walls. Go for a 1×4 or 1×6 profile in a glossy, color-saturated finish for designer cred.
How to Max Out the Look
Install these in a vertical stack to visually raise the ceiling (yep, it works). Choose a soft gray or warm taupe “grout” print—it defines the pattern without chopping up the space.
- Color Crush: Deep green, inky blue, or soft greige add depth and resist looking cheap.
- Keep It Tight: Press tiles firmly and use a seam roller so lines stay crisp.
- Mix Metals: Matte black faucet + brushed brass handles = considered, not matchy-matchy.
4. Micro-Mosaic That Looks Boutique
© 2025 AI Illustrator — Inspiration Only
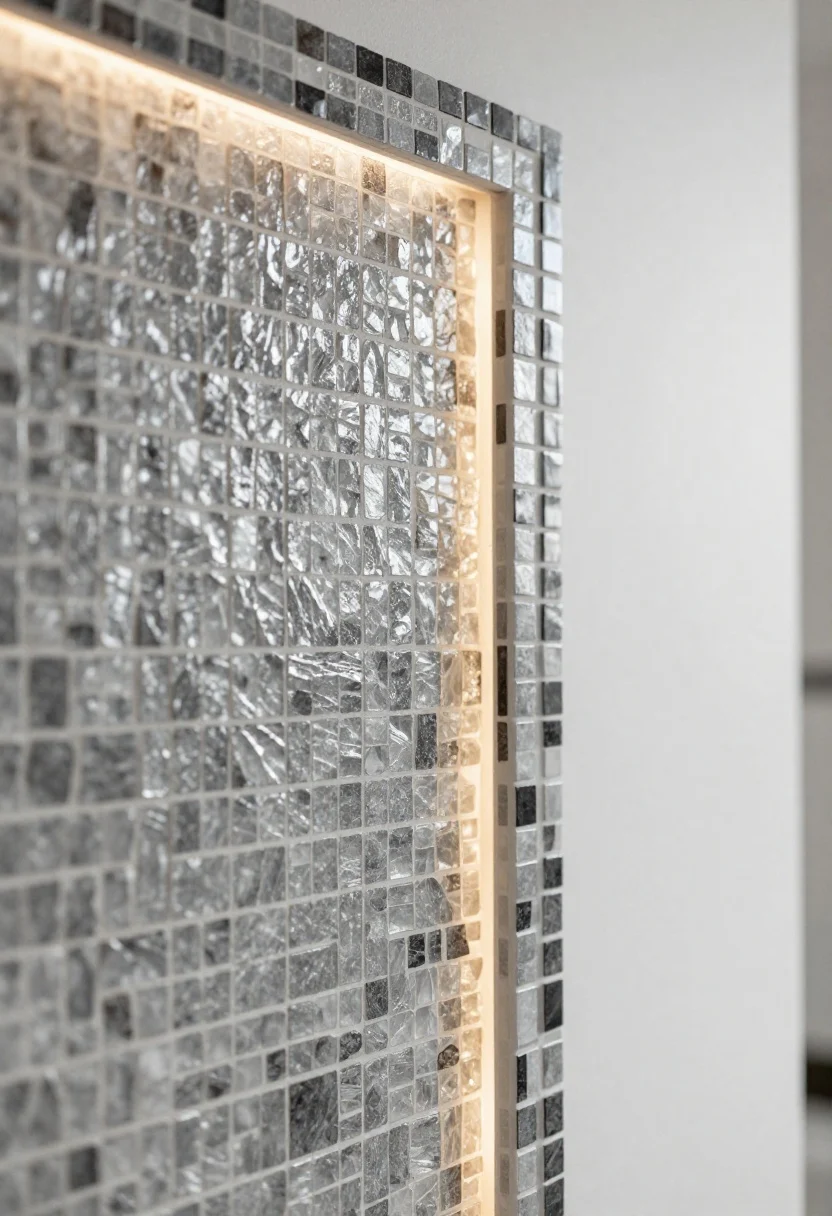
Micro-mosaics are like jewelry for your backsplash—tiny tiles, big payoff. Look for stone, glass, or mixed-material prints with subtle sheen. The complexity reads “custom” even if you did it on a Sunday afternoon.
Make It Elevated, Not Busy
In a small kitchen, keep the palette monochrome—think smoky grays or creamy whites. The texture does the talking, so your space won’t feel loud.
- Border Trick: Frame the mosaic with a thin border tile to make it look professionally planned.
- Focus Area: Use behind the range only and keep side walls simpler—instant focal point.
- Under-Cabinet Glow: Add a warm LED strip; glassy mosaics love a little spotlight.
5. Stone-Look Slab for That Chef’s Kitchen Energy
© 2025 AI Illustrator — Inspiration Only
Want full-on drama? Try a stone-look slab panel instead of small tiles. These come in larger peel-and-stick sheets that mimic soapstone, travertine, or dark marble—so chic and super renter-friendly.
Design Strategy
Dark stone behind light cabinets is a chef’s-kitchen staple. It creates contrast, hides splatters, and instantly looks high-end. FYI, a soft honed finish looks more authentic than high gloss.
- Seam Savvy: Place seams at natural breaks—behind the range or where cabinets divide—so they vanish.
- Hardware Match: Pair dark stone with aged brass or antique bronze for warmth.
- Minimalist Move: Keep countertops clutter-free so the “slab” can star.
6. Patterned Cement Tile Vibes (Minus the Weight)
© 2025 AI Illustrator — Inspiration Only
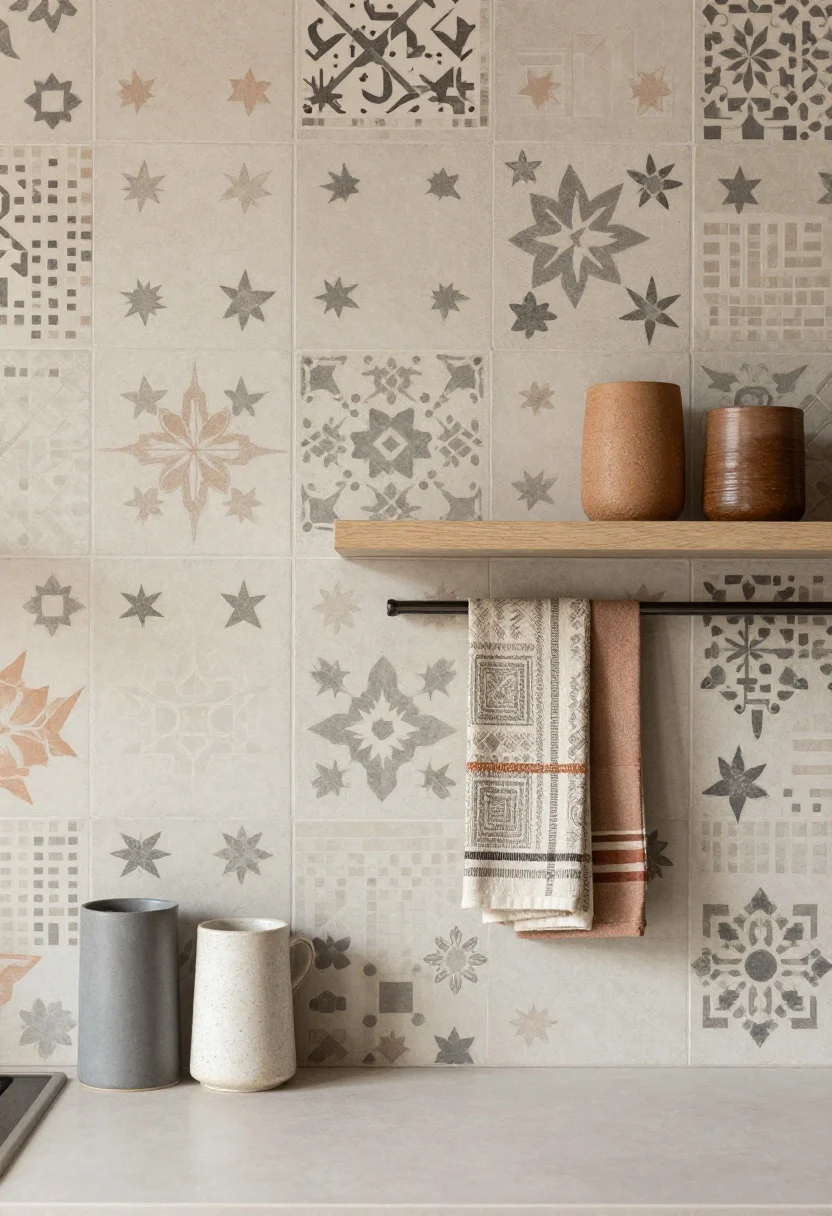
Obsessed with Moroccan cement tiles but not the weight or cost? Same. Choose peel-and-stick patterns with slightly muted colors and chalky textures to avoid the “sticker” look. Geometric stars, subtle florals, or micro-checks all play nicely in tight quarters.
Keep It Sophisticated
In small kitchens, patterns should be tight and refined. Large-scale prints can overwhelm. Think of this as your chance to add personality without chaos.
- Palette Plan: Use two dominant colors from the tile elsewhere—on dish towels or a rug—for cohesion.
- Half-Height Hack: Run pattern to mid-wall with a simple shelf above to break it up.
- Matte Matters: Matte finishes sell the cement illusion.
7. Brushed Metal and Metallic Accents (But Make It Quiet Luxury)
© 2025 AI Illustrator — Inspiration Only
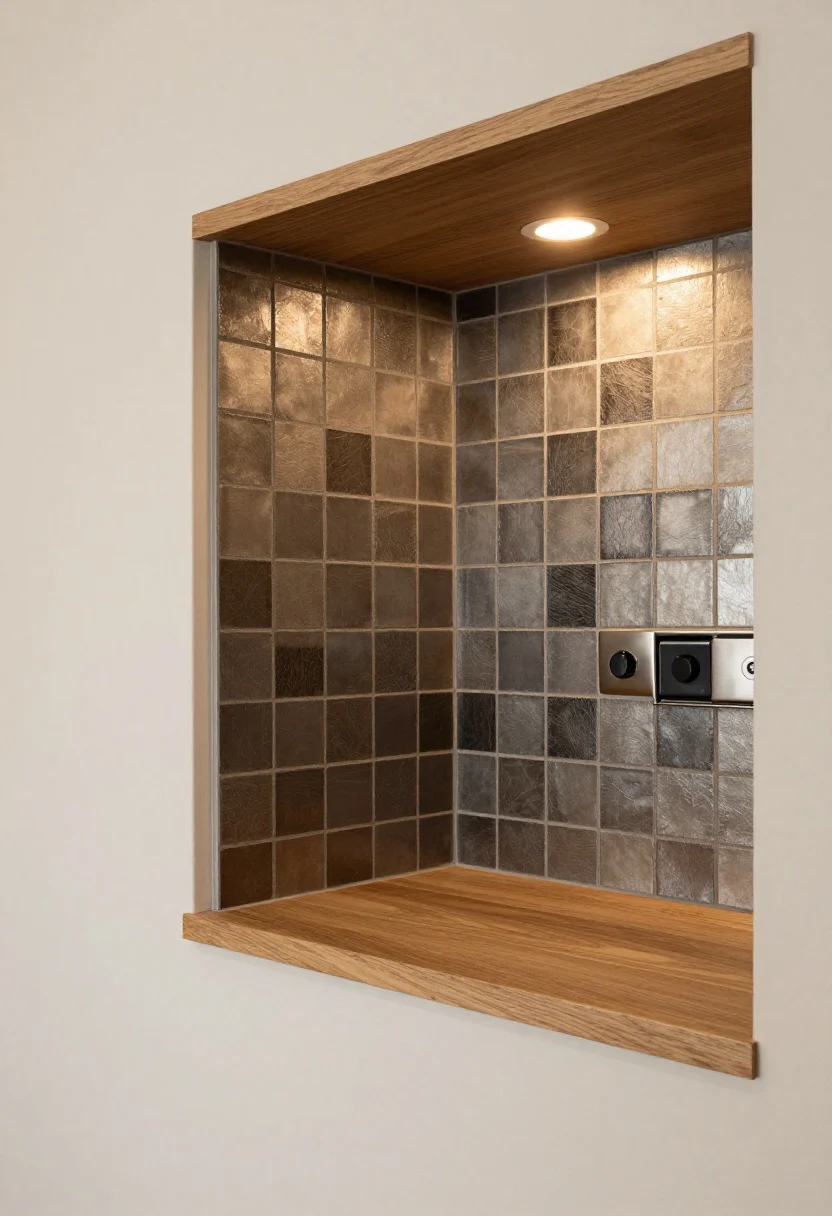
Metallic peel-and-stick tiles can be stunning if you keep them subtle. Look for brushed nickel, champagne, or gunmetal rather than mirror-shiny silver. The brushed texture diffuses light and looks like an intentional architectural detail.
Where It Shines
Use metallics behind a coffee station or bar nook for a little sparkle. Paired with warm woods and creamy paint, it reads high-end, not spaceship.
- Scale Smart: Use smaller metallic accents in a grid or herringbone among more neutral tiles.
- Blend It: Coordinate with your appliance finish for that “pulled together” effect.
- Dimmer = Designer: Put under-cabinet lighting on a dimmer for a soft evening glow.
8. Herringbone With Tone-on-Tone Contrast
© 2025 AI Illustrator — Inspiration Only
Herringbone is the pattern that quietly says, “I did my homework.” Choose peel-and-stick “tiles” in a tone-on-tone palette—like warm white with slightly darker grout lines—to get depth without busy-ness.
Make It Feel Architectural
Run the herringbone all the way up to the ceiling behind open shelves or a vent hood to elongate the wall. It’s a designer move that makes even a tiny kitchen feel considered.
- Orientation Trick: Angle the V’s upward to subtly lift the eye—architects do this for a reason.
- Seam Strategy: Start in the centerline and work out so cut edges land at the corners.
- Finish Strong: Cap raw edges with a slim PVC or aluminum J-trim for a pro look.
Installation Best Practices (For All Styles)
- Surface Prep: Degrease with TSP substitute, then wipe with isopropyl alcohol. Dry thoroughly—adhesive hates moisture and grime.
- Temperature Check: Install at room temp so the adhesive sets correctly.
- Dry Fit First: Lay out panels on the counter to plan seams and align patterns.
- Tools You Need: Utility knife with fresh blades, metal ruler, level, seam roller, microfiber cloth.
- Final Press: Roll every seam hard. Heat edges gently with a hair dryer to improve bond around outlets.
- Outlet Tip: Cut slightly small, then shave to fit. Replace plates for a clean finish.
How to Make Peel-and-Stick Look Pricey
- Match Sheen to Reality: If it’s “stone,” pick honed. If it’s “tile,” a soft gloss or satin makes sense. Super glossy faux-stone = tell.
- Edit the Palette: Keep cabinets, backsplash, and counters in a tight group of 2-3 tones. That cohesion screams custom.
- Add Real Materials Nearby: Wood, linen, ceramic—layering authentic textures elevates any faux.
- Light It Right: Warm 2700–3000K LEDs make finishes look rich (cool light can go harsh, FYI).
Quick Shopping Guide
- Marble-Look Sheets: Seek thicker vinyl (at least 3–5 mm) with printed veining and a matte topcoat.
- Tiles With “Grout” Lines: Opt for beveled edges or embossed “grout” for depth.
- Adhesive Quality: Look for brands with pressure-sensitive acrylic adhesive and high-temp resistance if near ranges.
- Sample First: Order swatches and stick them up for a week. See how they handle steam and cleaning.
Cleaning and Care
- Daily Wipe: Mild dish soap + warm water + soft cloth. Skip abrasive pads.
- Grease Control: Keep a splatter screen and wipe after cooking—stains set faster on vinyl.
- Heat Buffer: If your range lacks a backguard, add a small metal splash plate behind burners, IMO it’s worth it.
Bottom line: Peel-and-stick doesn’t have to mean “temporary and sad.” With thoughtful patterns, right finishes, and clean installation, your small kitchen can look designer-level without the demo dust—or the invoice.
You’ve got eight solid directions—pick one that fits your style, grab a seam roller, and give your kitchen the glow-up it deserves. Your takeout will taste better. Probably.